This tutorial’s goal is to get you comfortable editing files in Vim.
By the end of this tutorial, you should be able to:
Survive in Vim (modes, moving around, saving, quitting)
Understand the grammar of Vim (operators, motions, and text objects)
Edit text using operators, motions, and text objects together
Warning
Don’t worry if Vim’s not your thing yet,
Nano is totally fine.
This tutorial is meant to show you what’s possible.
Why Vim
Say your program is misbehaving.
To see what’s wrong, you scatter printfs through your code.
You tag each one with the word debug, so they’re easy to find later:
#include <stdio.h>int area(int width, int height) { printf("debug: width = %d\n", width); printf("debug: height = %d\n", height); int a = width * height; printf("debug: area = %d\n", a); return a;}int perimeter(int width, int height) { printf("debug: entered perimeter\n"); int p = 2 * (width + height); printf("debug: p = %d\n", p); return p;}void report(int width, int height) { printf("Rectangle %d x %d\n", width, height); printf("debug: about to call area\n"); printf("Area: %d\n", area(width, height)); printf("debug: about to call perimeter\n"); printf("Perimeter: %d\n", perimeter(width, height));}int main(void) { printf("debug: starting\n"); report(3, 4); report(10, 7); printf("Done. Run with --debug for the full trace.\n"); printf("debug: exiting\n"); return 0;}
The bug is fixed, and now every debug print has to go before you submit.
They’re scattered across different functions, buried among real code.
How would you remove them in Vim?
Have a think before opening the solution below.
Solution
:g/printf("debug/d
We’ll see how :g works later on.
The idea behind it is the heart of Vim:
you describe the lines you want, and Vim handles them all at once.
Now imagine doing the same thing in the editor you use today.
How would you have done it?
The files for the non-graded exercises are already available in ~/tutorial/.
Open a terminal and change your current directory to the tutorial folder.
Refer to Tutorial 0 if you’ve forgotten how to do it.
Once you’ve done that, open the run.c file with vim as follows:
vim run.c
Why Vim Feels Weird (At First)
Unlike traditional text editors,
Vim comes with different modes,
meaning that each key does a different thing depending on the situation.
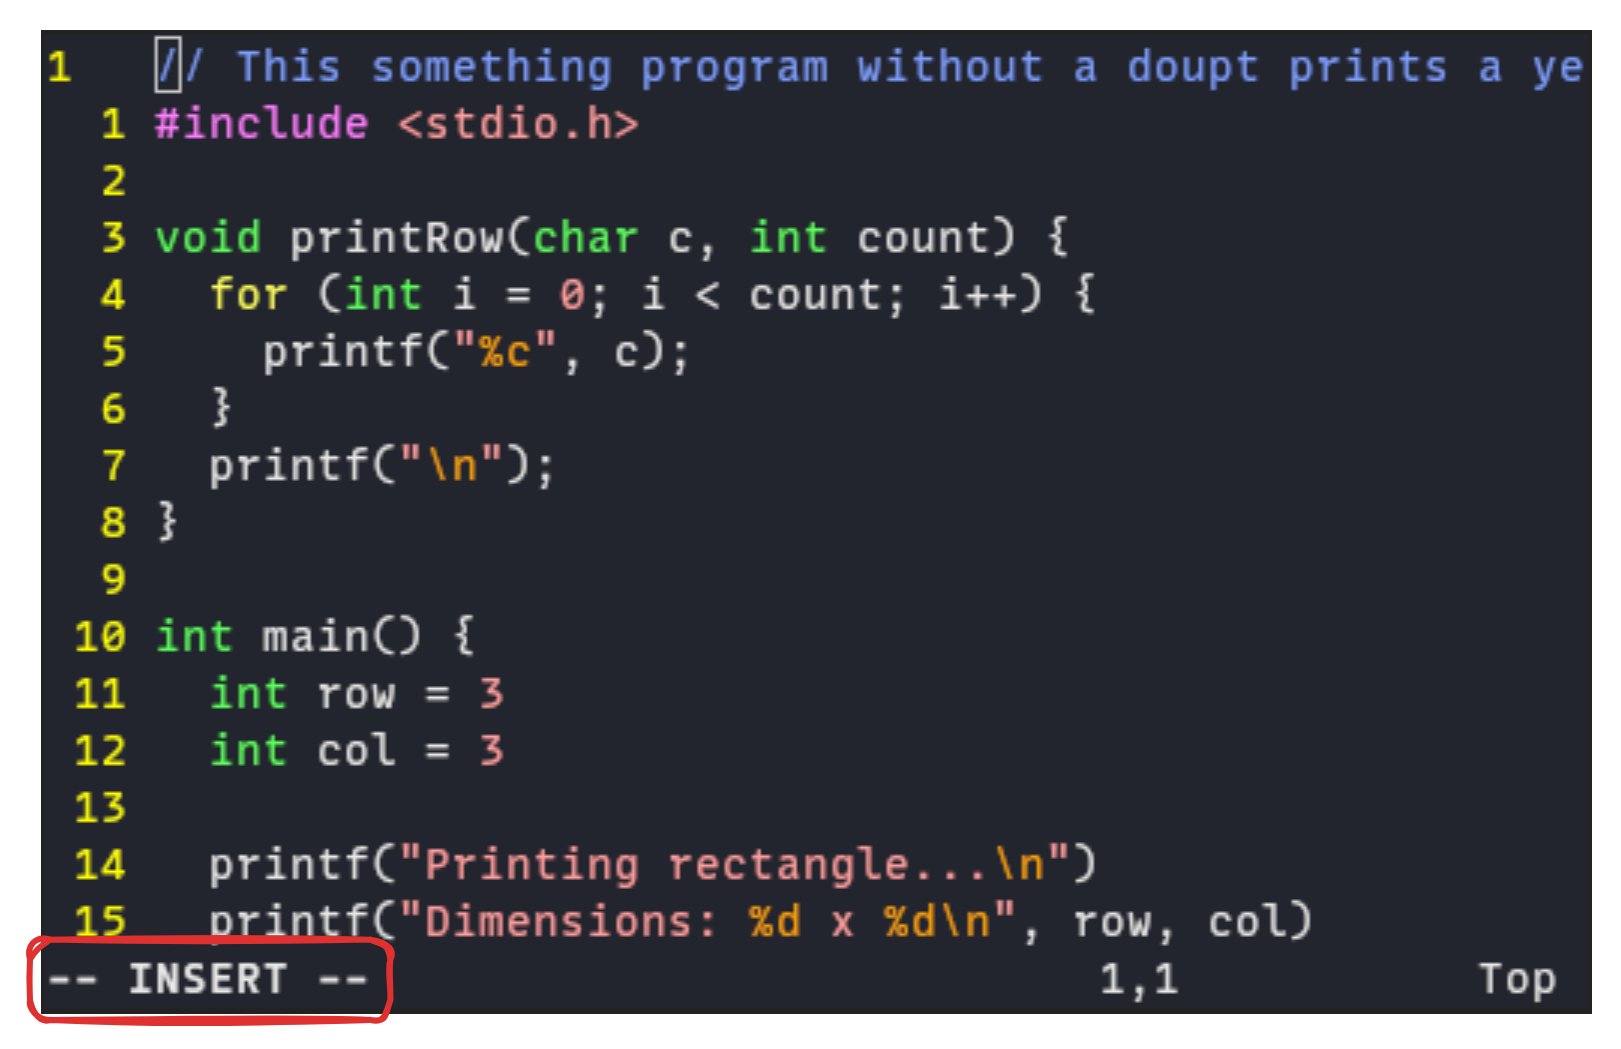
The mode can be seen at the bottom left corner.
For instance, if you’re in insert mode, it should say “--INSERT--”.
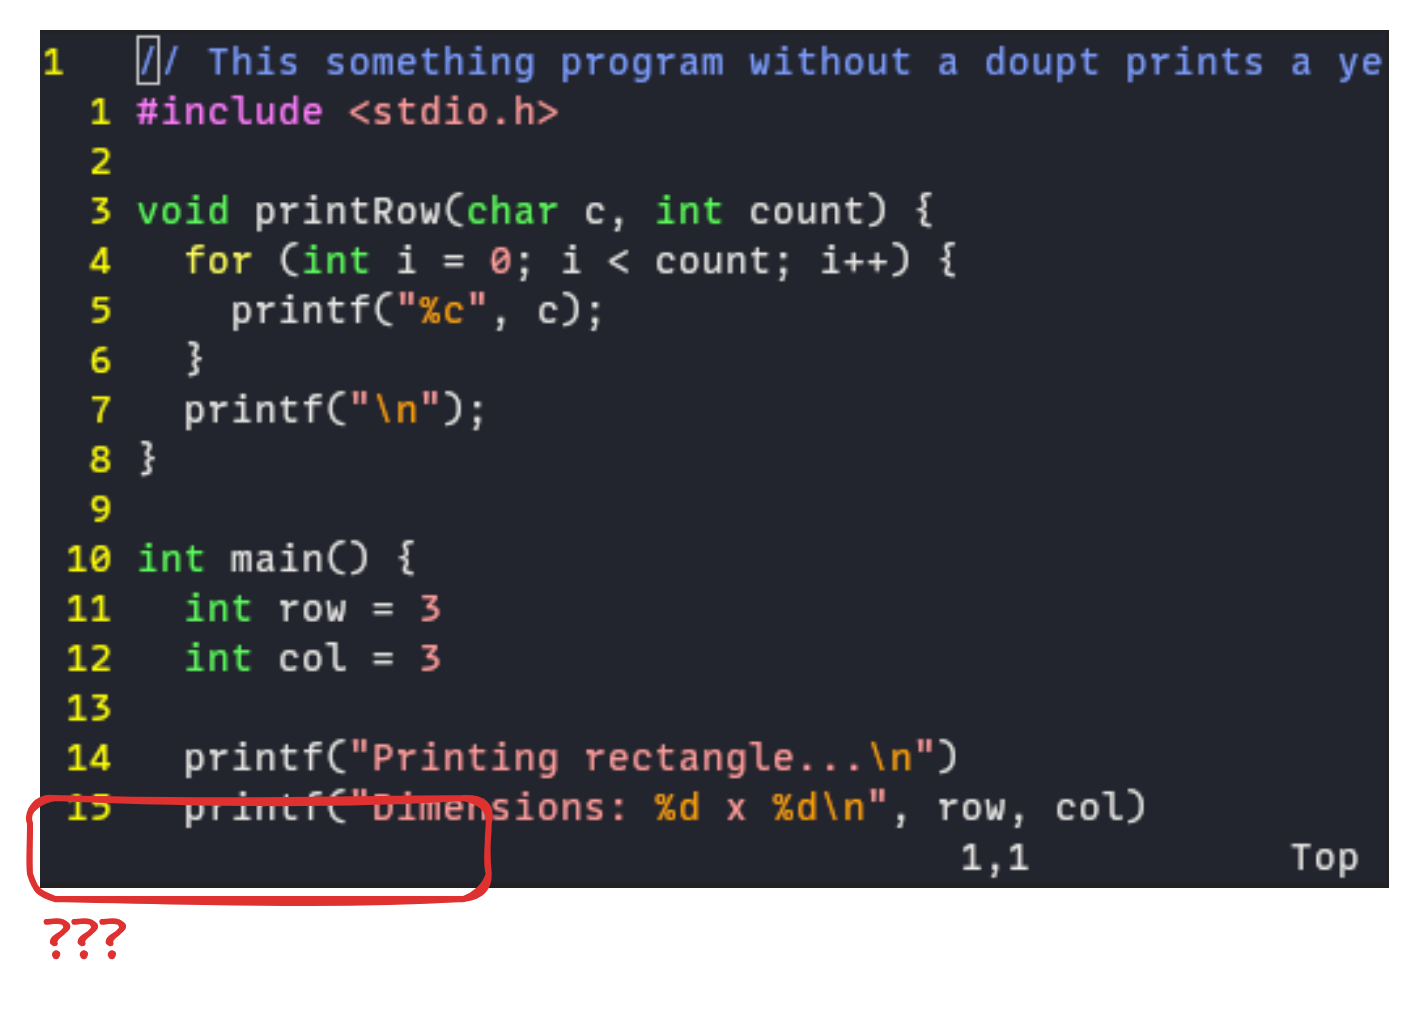
The default mode when you first enter Vim is known as normal mode.
You are expected to be in normal mode most of the time,
therefore,
there is no indicator that you’re in normal mode.
Since Vim is a modal editor,
your keys work differently depending on which mode you’re in.
You will often run commands in the wrong mode.
In such a crisis, focus on returning to Normal mode by spamming the Esc key.
Once you’re back in Normal mode,
you can focus on undoing the chaos that has ensued.
Surviving in Vim
Tip
Commands might feel abstract and hard to recall.
Fortunately, most of the commands have built-in mnemonics that make them super easy to remember.
Vim isn’t about memorising shortcuts (mostly),
you’re actually learning to speak a “language”. “Delete a word” becomes daw.
Command
Description
Mnemonic
i
Insert before the cursor
insert
a
Insert after the cursor
append
I
Insert before the first non-blank character
insert
A
Insert after the last character in line
append
Esc
Exit insert mode
escape
u
Undo last change
undo
Ctrl-R
Redo undone change
redo
:w
Save file
write
:q!
Quit without saving
quit
:wq
Save and quit
write, quit
The four insert commands differ only in where they start Insert mode.
The lowercase commands work relative to the cursor:
i starts before it, while a starts after it.
Their uppercase versions go to the corresponding boundary of the line:
I starts before the first non-blank character, while A starts at the end.
Whichever command you use, press Esc to return to Normal mode.
In run.c, try each insert command.
Before each attempt, place your cursor in the middle of an indented line.
Type iX, then Esc. Where did the X appear?
Undo with u, then try aX and Esc
Undo again, then try IX and Esc
Undo again, then try AX and Esc
Undo once more to restore the file
So how does i, a, I, A differ from each other?
Everyone uses Vim differently,
but A and I are among the best commands for quickly editing text.
A practical use of A is appending to the end of a line,
such as adding a semicolon that you forgot.
In run.c, four lines in the main function are missing one.
Put your cursor anywhere on the line int row = 3
Press A, type a semicolon, then press Esc
Undo with u to restore the line
Leave the other three alone. We’ll come back to them.
Reading the Friendly Manual (RTFM)
In Vim, you can type :h <command> to get help on any <command>.
Try reading the help page for the i command by typing :h i, followed by Enter.
To close the help window, type :close, then Enter.
Speaking Vim
Just like in English, Vim has its own set of grammar.
A typical command structure follows Count-Operator-Motion, or “COM”,
which conveniently makes up the first 3 letters of the word “command”.
Intent
Command
Count
Operator
Motion
Change word
cw
c
w
Delete word
dw
d
w
Delete 3 words
d3w or 3dw
3
d
w
Tip
You may notice that Vim commands can follow either a COM or OCM structure.
“OCM” flows more naturally when thinking in English,
where delete 3 words becomes d3w.
“COM”, on the other hand,
is easier to remember thanks to the mnemonic: the first three letters of “command”.
Use whichever structure fits your thinking best.
Let’s try some stuff first…
Delete the first word in run.c with dw
Change the next word: cw, type anything you want. Once done, press Esc
Undo all your changes using u
Operators can be thought of as verbs that describe the action you want to
perform on the text (e.g. delete, change).
Motions can be thought of as the location of the text you want to perform
the action on (e.g. word, line, etc).
The subsequent sections will define a substantial subset of operators and
motions that will make you efficient in Vim.
Motions: Say Where
The keystrokes described in this section only move the cursor.
It might seem weird why there is a need to have such an expressive language for
just moving the cursor.
You’ll see its power when you combine it with operators.
Arrow Keys
You can use h, j, k, l, for left, down, up, right respectively.
It isn’t that important to switch to hjkl right away.
If you don’t feel comfortable using hjkl,
it’s okay to stick to the arrow keys (for now) 1.
Vertical Movement
The only other vertical movement discussed here is G.
When prefixed with a number,
it goes to that line number.
Command
Description
Mnemonic
G
Goes to last line
Go
{line number}G
Goes to line number
Go
Try these in run.c.
Press G
Press 12G. You should now be on int row = 3
Get back to the first line of the file
What does 3G do?
How do I go to the first line of the file?
Moving Within a Line
You can use the following keys to go to the front and end of line.
Command
Description
0
Beginning of line
$
End of line
^
First non-whitespace character
Tip
If you are familiar with regex, ^ and $ mean the start and end of line respectively.
While you might be able to use the Home and End keys to go to the start and end of a line,
there does not seem to be an equivalent key for ^.
Put your cursor on the line int row = 3, which is indented.
Press $
Press 0
Press ^
How does 0 differ from ^?
Let me tell you about _
There is another way to reach the first non-whitespace character: _.
If you find it easier to type than ^, use it instead.
It even comes with a counterpart, g_,
which goes to the last non-whitespace character of the line.
_ and ^ may seem the same, though,
except that paired with an operator, _ acts differently.
Jumping to a specific character
Another interesting and powerful command is the t and f commands.
Command
Description
Mnemonic
f{character}
Finds next {character}
find
t{character}
Jumps till {character}
till
In run.c, go to the second line, which should read: #include <stdio.h>
Type t< and notice how the cursor is 1 character before the <
Type f< and notice how the cursor is on the <
Can you now explain the difference between t and f?
Optional: More Character Motions
Explore T, F, , (comma), and ; (semicolon).
F and T are the backward versions of f and t.
; repeats the last f/t/F/T in the same direction,
and , repeats it in the opposite direction.
Moving by Words
This section describes mainly how to traverse by words.
Command
Description
Mnemonic
w
Start of next word
word
e
End of next word
end
b
Start of previous word
backward
In most editors, you can achieve this by pressing Ctrl in conjunction with the arrow
keys. However, there does not appear to be an equivalent to the e command.
Try these on the long comment on the first line of run.c.
Press w a few times
Press 0, then press e a few times
Press b a few times to walk back the other way
How is e different from w?
Optional: More word motions
What is the difference between w and W (lowercase vs uppercase)?
How do I go to end of previous word?
w treats punctuation as its own word, so printRow('@', is several words to it.
W splits only on whitespace, so that whole chunk is one WORD.
To go to the end of the previous word, use ge.
Operators: Say What
Warning
Operators do not work on their own.
They have to be paired with motions or text objects.
Operators describe the verb on the text. Here we shall introduce two operators: c and d, which stand for change and delete (or disintegrate) respectively.
As mentioned previously, a command is made up of an operator and motion.
Do you know the keys to perform the following actions?
Delete until end of word
Change until f
Delete until end of line
What is the difference between c and d? Try dw and cw on the same word and compare what happens after each.
Now run some of them against real code.
Go to the line printRow('@', col, 199); and press ^.
Type dt(. What’s left of the line?
Undo with u, then type df( instead. Which character did f take that t left behind?
Undo again, then type d$ to clear from the cursor to the end of the line
Undo once more to restore the line
Notice that you learnt no new keys here.
You paired an operator you know with motions you already knew.
Optional: Two ways to delete a word
Is there a difference between dw and de?
Yes. dw deletes up to the start of the next word,
so it takes the whitespace after the word with it.
de stops at the end of the current word and leaves that whitespace behind.
Acting on Whole Lines
You can double an operator (e.g. cc or dd) to act on the entire line.
This is the most direct way to delete or change a whole line.
Optional: There's no way to delete a line other than dd right?
Ackshually 🤓☝️, there is.
The motion you need is _, the one from earlier.
This is how it differs from ^: _ is a linewise motion,
so you can think of it as “the line”.
d_ therefore means “delete the line”.
Scroll down to the filler at the bottom of run.c,
where the line printRow('@', 10, 199); repeats several times.
Put your cursor anywhere on one of them, then press dd. Did it matter where in the line the cursor was?
Undo with u
Press cc on that same line. What happened to the indentation?
Press Esc, then undo again
Doubled operators take a count too:
Put your cursor on one of those lines, press 3dd, then undo
Text Objects: Name the Thing
Operators do not have to be paired only with motions;
they can also be paired with text objects.
Informally, you can categorise text objects into two categories.
Word-like objects: Objects that are separated primarily by whitespace. e.g. words
Surrounding-pair objects: Objects that are defined by opening and closing delimiters. e.g. quotes, brackets
Here are some commonly used text objects.
Warning
Just like motions,
text objects need to be paired with operators.
Text objects
i variant
a variant
Word
iw (inside word)
aw (around word)
Single quotes
i' (inside ‘quotes’)
a' (around ‘quotes’)
Double quotes
i" (inside “quotes”)
a" (around “quotes”)
Parentheses
i) (inside parentheses)
a) (around parentheses)
Square brackets
i] (inside brackets)
a] (around brackets)
Curly braces
i} (inside braces)
a} (around braces)
Let’s make some changes using text objects.
In run.c, go to the start of the line with the following content (using your favourite way): printf("Printing rectangle...\n");
ci" to change the content inside the quote (Note: Even if you’re not inside quotes, Vim will look ahead for the nearest set of quotes)
Change to something else (e.g. "Hello World\n") then press Esc when done
Since text objects do not work on their own,
pair them with the d operator in this exercise.
What’s the difference between diw and daw?
What’s the difference between di) and da)?
Place your cursor in the middle of a word, what’s the difference between bdw and daw? (Hint: Try the dot operator after learning about it later - what’s the difference?)
Copying and Selecting
Copying and Pasting
The operator for copying is y, which stands for yank.
Since it is an operator,
it can be used with the motions and text objects described above.
What are the commands to copy the following?
A word
The entire line
Three lines at once
After yanking, use p to paste.
Visual Mode: Select the Text
Sometimes it is easier to select the text first,
then decide what to do with it.
That is what Visual mode is for.
Command
Description
v
Select by character
V
Select whole lines
Ctrl-V
Select a rectangular text block
Esc
Return to Normal mode
Once text is selected,
you can use operators such as d, c, or y on the whole selection.
Visual and Visual Line Modes
Place your cursor at the start of a word and press v
Extend the selection with a motion, then press y to yank it
Press V, select three whole lines with j, then press y
Paste the copied lines with p, then undo the paste with u
Optional: Visual Block Mode
Visual Block mode is useful when the same column needs changing across several lines.
Find three consecutive lines with the same indentation in run.c.
Move to the first non-blank character of the first line with ^
Press Ctrl-V, then use j to select the same column on all three lines
Press I, type // , then press Esc
Vim inserts the comment on every selected line. Press u to undo the block edit
Repeating and Scaling Up
To apply the same change at multiple locations, some editors adopt the multi-cursors approach. However, in Vim, the workflow is to apply a change in one location, then repeat the change in all other locations.
The Dot Operator
A change such as d3w or dw can be repeated by pressing . (dot).
In run.c, four lines in the main function are missing semicolons.
You could fix each one by hand, pressing A, ;, Esc on every line in turn:
A;, A;, A;, A;. Is there a better way?
Go to the first line missing a semicolon, int row = 3.
Press A, type a semicolon, then press Esc
Move to the next line missing one (they are not all adjacent)
Press . to repeat the entire A; change
Repeat steps 2 and 3 until all four lines end with semicolons
Searching
Command
Description
Mnemonic
/pattern
Forward search for {pattern}
?pattern
Backward search for {pattern}
n
Repeats latest search
next
N
Repeats latest search in opposite direction
In run.c, search for the word “print”: Type /, followed by print, then press the Enter key
Use n and N to see the next and previous results
Search and Replace
Vim calls search and replace substitution.
The basic command is :s/{pattern}/{replacement}/.
Command
Description
:s/old/new/
Replace the first match on the current line
:s/old/new/g
Replace every match on the current line
:%s/old/new/g
Replace every match in the file
:%s/old/new/gc
Replace matches in the file, asking you each time
The % selects every line in the file.
The g flag replaces every match on each selected line,
while c asks for confirmation before each replacement.
This g is a flag for :s; it is different from the :g command introduced later.
In run.c, replace row with row1, inspecting each match before deciding:
Run :%s/row/row1/gc
Press y to replace a match, n to skip one, or q to stop
When you are done experimenting, press u to undo the substitution
Optional: Macros
For more complex actions,
you can record a sequence of commands as a macro,
then replay it later.
To start recording a macro, press q, followed by a lowercase letter that identifies the macro
To stop recording, press q again
To replay the macro, press @ followed by the letter used in the first step
In run.c, the function printRow has an unused parameter.
Let’s use a macro to remove the unused parameter.
Start at the first line of the file. (Do you remember how to do this?)
Search for the function name printRow using /
Start recording with qq
2f, (What does this do?)
dt) (What does this do?)
Stop recording with q
Go to the next search occurrence with n
Play the macro with @q
Repeat the previous 2 steps until all the functions have been fixed
(Extra) You can use @@ to repeat the last macro
Now you can clean up those debug lines from the start of the tutorial.
Your file has debug prints scattered around, each starting with printf("debug.
Comment them all out.
/printf("debug to find the first
Record: qq, then I//, Esc, then n, then q
99@q
It won’t run 99 times. When n finds no more matches it errors, and the error stops the macro.
So it hits every debug line and stops.
Doing Something on Every Matching Line: :g
If we had to comment out every debug line scattered throughout run.c,
repeating the same edit by hand would get tedious.
Since the same action should happen on every matching line,
Vim can perform the whole cleanup in one command:
:g/printf("debug/norm I//
:g/pattern/command finds every line matching pattern,
and runs command on it.
Here the command is norm I//: run the keys I// on every match at once.
Want to delete the lines instead of commenting them?
Just swap the command:
:g/printf("debug/d
This is where Vim stops feeling like an editor
and starts feeling like a little language.
:g is only the doorway, there is a lot more out there.
Graded Task(s)
The graded tasks are in a separate folder called tutorial-graded, which is in your home folder.
Enter the Graded Task Folder
Change to ~/tutorial-graded before continuing
(refer to Tutorial 0 if you’ve forgotten how to do this)
Bob’s refactoring his codebase.
He’s sick of making the same repetitive edits over and over again.
So he asks you for help, figuring it’s more fun to grind through it with a friend.
The codebase is still too big for two.
You could round up more friends… but there’s only so many friends to go around.
Bob’s code never works on the first try, so like any good programmer he talks it through with his rubber duck.
Over the years, all that debugging rubbed off. The duck gained sentience.
And it’s convinced Bob will mess this up. So it left you some utilities.
Sentient Rubber Duck
The grading check is quite stringent, so you must not modify unnecessary things.
The duck gives you four tools:
verify <filename> checks whether a file matches the expected state
changes <filename> shows what you’ve changed from the original, so you can spot anything you broke
reset <filename> restores a file to its original state if you mess it up
make format formats the code; the checker ignores whitespace differences
Task 1
Bob has been told that a += 1 increments a.
He does not believe it.
One example is not enough, either.
He wants to watch the value change over and over again.
Fifteen times should do it.
In increment.c:
Inside main, declare int a = 5; as the first line
Add these two lines:
printf("%d\n", a);a += 1;
Repeat that pair until it appears exactly 15 times (30 lines total)
Do not replace the repeated statements with a loop or change them into equivalent code
The return 0 statement at the end of the program should remain
Compile and run the program. It should print the numbers 5 through 19, one per line
Run verify increment.c when you are done
Hint
How can you copy multiple lines and repeat actions?
Task 2
Bob has already tried the experiment again,
but this time for b -= 1.
He was even less certain about decrementing,
so he repeated it 30 times.
After staring at all those repetitions,
he realises that b is not a very helpful variable name.
He would rather call it variable_i_am_decrementing.
In decrement.c, rename every use of the variable b to variable_i_am_decrementing
Run verify decrement.c when you are done
Hint
How can you replace things?
Task 3
Bob’s next job: the debug prints.
While chasing a bug he dropped printf("debug: ...) lines all over comment.c, and now they clutter everything.
He’s not ready to delete them (what if the bug comes back?),
so he wants them commented out for now.
In comment.c, comment out every debug line
Run verify comment.c when you are done
Hint
How can you perform the same action on every matching line?
Task 4
Of course, the bug came back.
Bob wants his debug prints working again,
but they’re all commented out in uncomment.c from last time.
While you’re at it,
he finds the debug tags (e.g. dbg:, [d]) inconsistent,
so retag each one to [DEBUG].
In uncomment.c, uncomment every commented-out debug printf line and change its prefix to [DEBUG]
Run verify uncomment.c when you are done
Hint
How can you replace things?
Before You Finish
Run verify for every task and make sure each one is successfully submitted:
verify increment.c
verify decrement.c
verify comment.c
verify uncomment.c
The tutorial is not complete until all four tasks have been successfully submitted.
Extra: More Vim
These are the commands people talk about when they say, “What I wish I could’ve told myself when I was just starting Vim.”
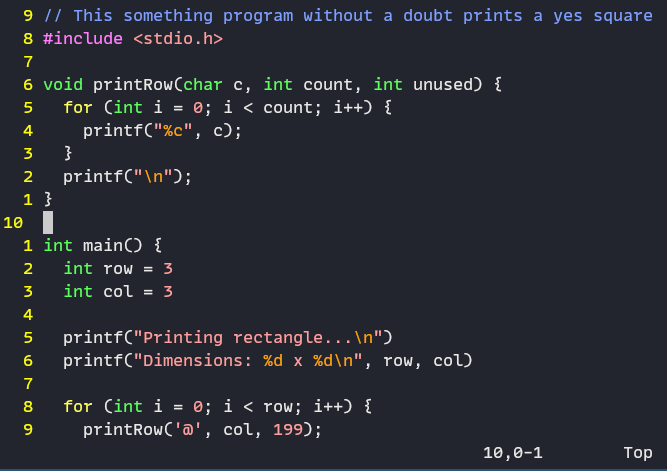
Relative Line Numbers
Relative line numbers show how far each line is from your cursor.
In the figure below,
notice the line starting with “void printRow...” is 6 lines above your current line
(the current line is in the middle of the screen).
That means 6 lines up,
so you can jump there with 6k.
It might feel unintuitive at first,
but enabling relative line numbers is a popular setting among Vim users.
To enable relative line numbers,
add the following line to your ~/.vimrc file (create it if it doesn’t exist):
set relativenumber
Where’d I go?
Unless you’re godlike at typing, mistakes are bound to happen. Most of the time, you should be able to use Ctrl-O. If you accidentally press Ctrl-O, you can use Ctrl-I.
Tip
i and o stand for in and out respectively.
When you press something wrong, think: “Get me out of here”.
Let’s simulate an accident and watch how Ctrl-O can save you.
Start at any line in run.c (except the last line)
“Accidentally” press G
Press Ctrl-O to jump back to your original position
Press Ctrl-I to “undo” the Ctrl-O command
Moving the Screen
A lot of times, we want to retain the cursor position and just move the screen (think of it as scrolling with the mousewheel). To scroll up or down, we can use Ctrl-U and Ctrl-D respectively. Additionally, you can use zz to center the cursor on the screen.
Try out these commands: Ctrl-U, Ctrl-D and zz
Your Vim, Your Vimrc
Every devoted Vim user has their own Vim config 2,
located at ~/.vimrc.
By default,
this file doesn’t exist,
and you would have to create it yourself.
Tip
In WebTop,
there’s already a config file located at /etc/vim/vimrc.local,
with some sensible defaults.
You can view the file but not edit it.
Any setting in ~/.vimrc will overwrite those settings.
Vim Outside of Vim
You don’t have to give up Vim when you leave Vim. Most text editors and IDEs let you bring Vim’s modal editing with you (there’s often a “Vim mode” in many editors!) 3. Learning Vim doesn’t lock you into one tool. It’s a transferable skill.
The uninitiated can’t quit Vim. The devoted won’t. If you want to be a devoted Vim user, encourage yourself to gradually pick up one or two new commands every week.
Run this command inside your Tutorial environment:
progress
It shows whether you have successfully completed the tutorial and which
individual tasks have been recorded as complete.
The progress command is available only inside a Tutorial environment, not in
the general CS1010 WebTop environment.
Footnotes
Another Sriram anecdote: as much as I like Vim, in more than 10 years, I have never switched to h, j, k, and l. I still use arrow keys. This is arguably a heinous crime but honestly, you do you. ↩
Another Sriram anecdote: I do not actually have a .vimrc file because I like training myself to handle default Vim when connected to a random server to fix it. ↩
Sriram’s anecdote: this is how I use Vim, either inside VSCode when programming locally or directly when connected to a remote server. Even this website’s publishing system, Obsidian, supports Vim keys ↩